Mummy Brownies – Spooky‑Sweet Halloween Treats
Introduction
Begin with a warm, story‑driven introduction
Describe how you first made mummy brownies as a kid (maybe with your own mother or during trick‑or‑treat prep), the giggles when decorating the “bandages,” and the cozy kitchen scene—flour on the counter, spooky music, warm oven smells. Set a festive, inviting tone: you’re about to bake something fun, easy, and Halloween‑friendly.
Table of Contents
Why You’ll Love This Mummy Brownie Recipe
Easy Meal Prep & Process
• Minimal ingredients and steps—no fancy gear required
• Mix, bake, decorate—easy as 1‑2‑3
Customizable Ingredients
• Swap dark cocoa for milk cocoa or add sea salt or caramel bits
• Gluten‑free flour or nut‑free options available
Visually Appealing
• Cute mummy “bandages” of white drizzle or frosting
• Candy eyes add a playful finish—very Instagram‑ready
Versatile Cooking Methods
• Bake in a 8×8 or 9×9 pan
• Also works as skillet brownies or mini‑brownie bites
Ingredients
Essential Ingredients
- Unsweetened cocoa powder – good quality for deep chocolate flavor
- Granulated sugar – adjust a little for sweetness level
- Butter – melted, ideally unsalted
- Large eggs – room temperature for better texture
- All‑purpose flour – or gluten‑free flour blend
- Chocolate chips – for melty pockets of gooeyness
Substitutions & Quality Notes
- Cocoa: Dutch‑processed yields smoother flavor; natural cocoa gives sharper bite
- Sugar: brown sugar adds chewiness & caramel notes
- Flour: almond flour or gluten‑free blend—reduce slightly if denser
- Butter: can substitute melted coconut oil if dairy‑free
How to Make Mummy Brownies (Step-by-Step Instructions)
Step 1: Preheat the Oven
Preheat your oven to 175 °C (350 °F).
Line an 8×8-inch (20×20 cm) baking pan with parchment paper, leaving a bit of overhang on the sides. This isn’t just about sticking prevention—it’s your golden ticket to lifting the whole brownie slab out cleanly for perfect cutting.
Chef tip: Lightly spray the parchment with nonstick spray if you’re worried about extra sticking.
Step 2: Melt the Butter and Mix with Cocoa
In a medium heat-proof bowl, melt ½ cup (1 stick) of unsalted butter using a double boiler or in the microwave in 20-second intervals—stir between each burst to avoid scorching.
Once melted, whisk in ½ cup unsweetened cocoa powder and 1 cup granulated sugar until the mixture turns into a thick, glossy chocolate base.
Look for: A shimmery texture and consistency like syrupy lava—smooth, no grainy bits.
Step 3: Mix Dry Ingredients and Combine
In a separate bowl, whisk together ½ cup all-purpose flour and ¼ teaspoon salt.
Gradually sift or sprinkle the dry mix into your wet chocolate base. Fold gently with a spatula just until no dry streaks remain.
Why it matters: Overmixing activates gluten, which leads to cakier brownies—we want that fudgy chew, not a sponge.
Step 4: Add Eggs
Crack in 2 large eggs, one at a time, whisking well after each. This step gives the batter body and shine. By the time both eggs are in, the mix should be smooth and a little springy.
The look: The batter should fall off the whisk in thick ribbons—not too runny, not too stiff.
Step 5: Fold in Chocolate Chips
Add ½ cup semi-sweet chocolate chips (or go wild with chunks, white chocolate, or butterscotch). Gently fold them into the batter for gooey, melty pockets once baked.
Pour the finished batter into your prepared pan, smoothing the top with an offset spatula or the back of a spoon.
Step 6: Bake and Decorate
Bake for 20 to 25 minutes, depending on your oven. You want the edges to be set and the center to be just a little jiggly—it’ll continue to cook from residual heat.
Let the brownies cool in the pan for about 10–15 minutes, then lift them out using the parchment overhang.
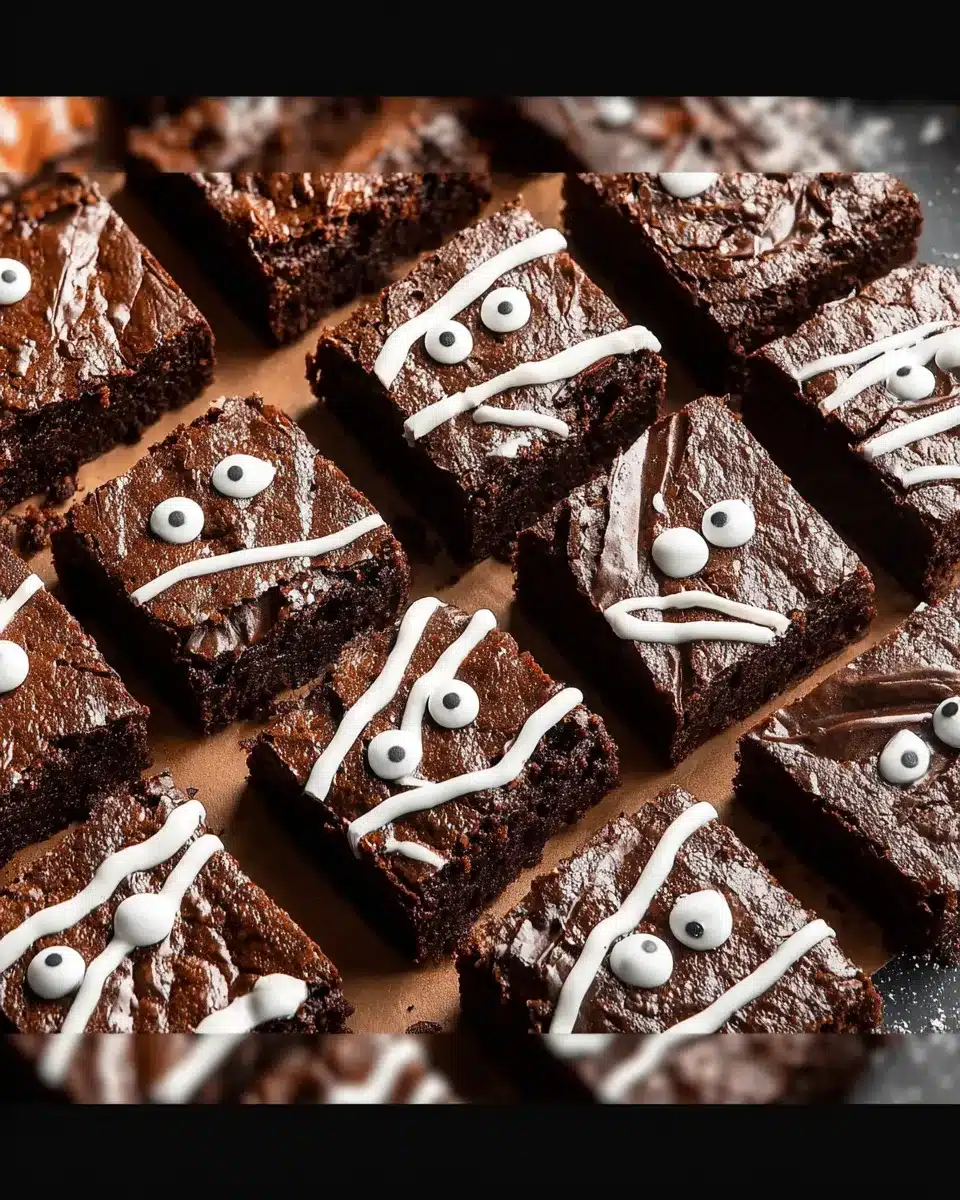
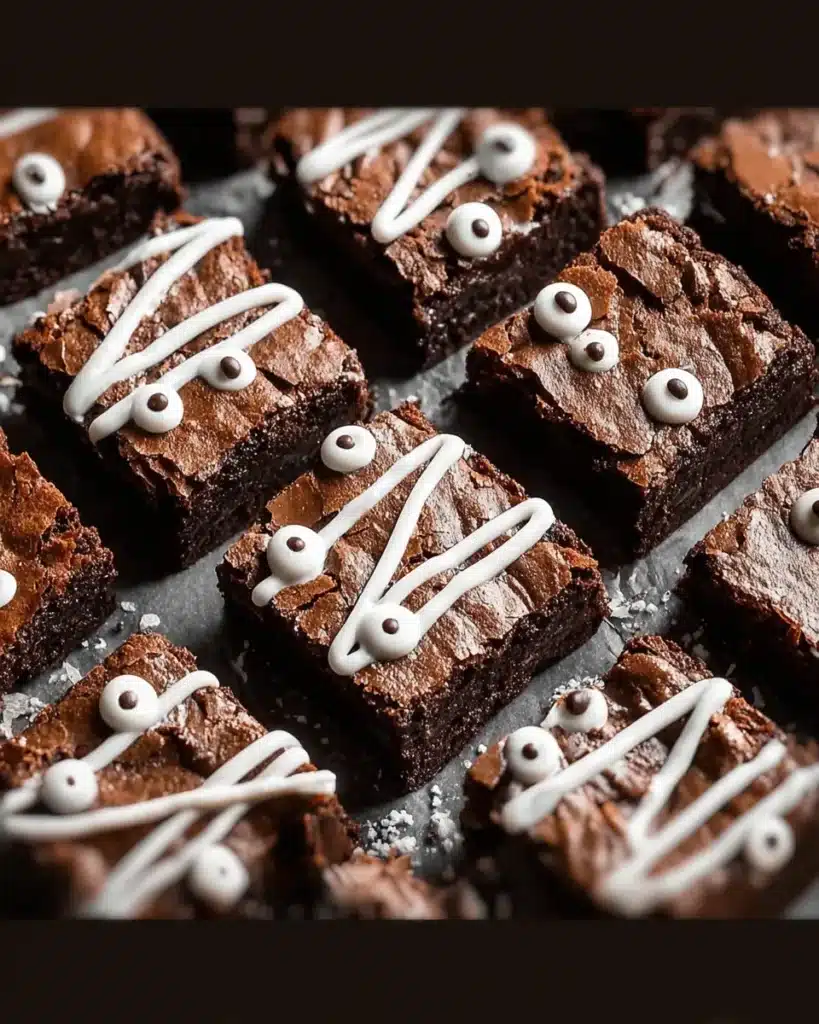
Now the fun part—decorate like a mummy:
- Pipe melted white chocolate or vanilla frosting in zig-zag lines across each cut square.
- Press in candy eyes while the frosting is still soft but not hot.
Final note: Let everything set before serving. The frosting firms up, the flavors marry, and your mummies stay spooky—not smudgy.
5. Tips and Customizations
- Add‑ins: swirl in caramel bits or salted nuts, sprinkle sea salt on top, mix in dried fruit
- Storage: keep at room temperature up to 5 days, or refrigerate up to 1–2 weeks (dust bandage frosting with powdered sugar if condensation forms)
- Freezing: wrap leftovers tightly—freeze up to 3 months
- Reheating: microwave a single brownie for 10 seconds for that fresh‑out‑of‑the‑oven feel
Chef’s Tips
- Don’t overcrowd your pan—use parchment and loosen edges before lifting out
- Pat it dry (your butter or bowl) so you get that shiny crust—moisture is the enemy of crisp edges
- Let it rest before cutting: juices settle, and you’ll get cleaner slices
- Most people mess this up: stirring too much—fold gently to keep fudgy texture
- This is key: candy eyes should be pressed into slightly warm but not too hot frosting—so they stay put
Related Halloween Recipes to Try After Mummy Brownies
If you loved making these spooky-sweet treats, here are a few more Halloween hits to keep the festive fun rolling:
- Halloween Rice Krispies Treats – Crunchy, colorful, and great for kids to decorate.
- Halloween Monster Meatball Sliders – Savory, silly, and perfect for party platters.
- Mummy Meatballs for Halloween Parties – Keep the mummy theme going with these protein-packed bites
Benefits of Mummy Brownies
| Benefit | Why It Matters |
| Fun & Festive | Perfect for Halloween parties and themed gatherings |
| Easy to Make | Simple steps, minimal mess—great for baking with kids |
| Customizable | Add your twist with nuts, caramel, frosting colors, or fillings |
| Visually Impressive | Instagram-worthy treats with minimal decorating skills needed |
| Make-Ahead Friendly | Bake and decorate in advance, store or freeze for later |
| Crowd-Pleaser | Loved by both kids and adults—goes fast at any event |
FAQs
What is a mummy brownie?
A fudgy chocolate brownie decorated to look like a little mummy, covered in “bandage” frosting or white chocolate drizzle, with spooky candy eyes.
How do you make mummy brownies?
Bake a basic brownie, then pipe or drizzle white chocolate or frosting across each square and add candy eyes while still tacky.
Can I customize them?
Yes—swap add‑ins, use dairy‑free or gluten‑free substitutions, swap white chocolate for other colors—get creative!
How long do they last?
They’ll be best for up to 5 days at room temperature, up to 1–2 weeks refrigerated, and up to 3 months frozen.
Conclusion
Emphasize again the fun, flexible, festive nature of mummy brownies—they’re perfect for Halloween parties, baking with kids, or sharing with friends. Encourage creativity: you can spice them with pumpkin spice, color the frosting, use mini‑sized brownie bites, or dip the edges in sprinkles. Encourage you to share photos or try variations.
Try this recipe, make them your own, and tag someone you’ll spook this Halloween night!
And hey—don’t forget to invite your friends and visit my Pinterest page for more spooky treats and fun ideas.
Mummy Brownies – Spooky‑Sweet Halloween Treats

Fudgy, spooky-sweet Mummy Brownies with melty chocolate centers and playful candy eyes—perfect for Halloween baking with kids or parties!
- Prep Time: 15 minutes
- Cook Time: 25 minutes
- Total Time: 40 minutes
- Yield: 16 brownies 1x
- Category: Dessert
- Method: Baking
- Cuisine: American
Ingredients
- 1/2 cup (1 stick) unsalted butter, melted
- 1/2 cup unsweetened cocoa powder
- 1 cup granulated sugar
- 1/2 cup all-purpose flour
- 1/4 tsp salt
- 2 large eggs, room temperature
- 1/2 cup semi-sweet chocolate chips
- White chocolate or vanilla frosting (for mummy bandages)
- Candy eyes
Instructions
- Preheat oven to 175°C (350°F). Line an 8×8-inch baking pan with parchment paper and lightly spray with nonstick spray.
- Melt butter in a heat-proof bowl using microwave or double boiler. Stir in cocoa powder and sugar until smooth and glossy.
- In a separate bowl, mix flour and salt. Gradually fold into chocolate mixture until no dry streaks remain.
- Add eggs one at a time, whisking well after each until batter is thick and shiny.
- Fold in chocolate chips gently. Pour batter into prepared pan and smooth top.
- Bake 20–25 minutes until edges are set and center is slightly jiggly. Cool in pan for 10–15 minutes, then lift out using parchment.
- Cut into squares. Pipe melted white chocolate or vanilla frosting in zigzag lines for mummy bandages. Press in candy eyes while frosting is tacky.
- Let set before serving.
Notes
For extra flavor, add sea salt, caramel bits, or use almond/gluten-free flour. Decorate once brownies are cool for best results. Store in an airtight container at room temp up to 5 days.
Nutrition
- Serving Size: 1 brownie
- Calories: 180
- Sugar: 16g
- Sodium: 85mg
- Fat: 9g
- Saturated Fat: 5g
- Unsaturated Fat: 3g
- Trans Fat: 0g
- Carbohydrates: 23g
- Fiber: 1g
- Protein: 2g
- Cholesterol: 30mg
Keywords: mummy brownies, halloween brownies, spooky treats, chocolate, brownies