Hibachi Recipe: How to Master Japanese Steakhouse Cooking at Home
I still remember the first time I sat at a hibachi grill as a kid—eyes wide as flames shot up and the chef flipped shrimp into his hat. That sizzle, the buttery fried rice, the savory steak—pure magic. Years later, I wanted that magic in my kitchen. And guess what? With the right hibachi recipe and techniques, you can make it happen. Let me show you how.
Table of Contents
What Is a Hibachi Recipe?
The Origins of Hibachi-Style Cooking
- Brief history of hibachi in Japan vs. teppanyaki
- Western reinterpretation at Japanese steakhouses
- Why it’s more about the technique than the actual grill
What Makes a Recipe “Hibachi”?
- High-heat grilling or pan-searing
- Classic flavor profiles: soy, garlic, sesame, butter
- The trifecta: protein, vegetables, fried rice
Essential Ingredients for a Homemade Hibachi Recipe
Proteins That Work Best
- Chicken breast/thigh
- Shrimp
- Steak (NY strip, sirloin, filet mignon)
- Tofu for vegetarian option
Must-Have Sauces and Seasonings
- Soy sauce, garlic, ginger
- Toasted sesame oil
- Japanese mayo (Kewpie)
- Mirin (optional but adds depth)
- Fresh lemon juice and hibachi mustard sauce
Vegetables and Sides
- Onion, zucchini, mushrooms, carrots
- Day-old rice (for fried rice)
- Eggs, scallions, and peas
Include a downloadable ingredient checklist table

Tools and Equipment You’ll Need for Hibachi at Home
The Right Cooking Surface
- Flat-top griddle vs. large cast iron pan
- Why nonstick isn’t ideal here
Other Handy Tools
- Metal spatulas
- Tongs
- Squeeze bottles for sauces and water
- Rice paddle or wooden spoon
Step-by-Step Hibachi Recipe (Chicken, Vegetables, and Fried Rice)
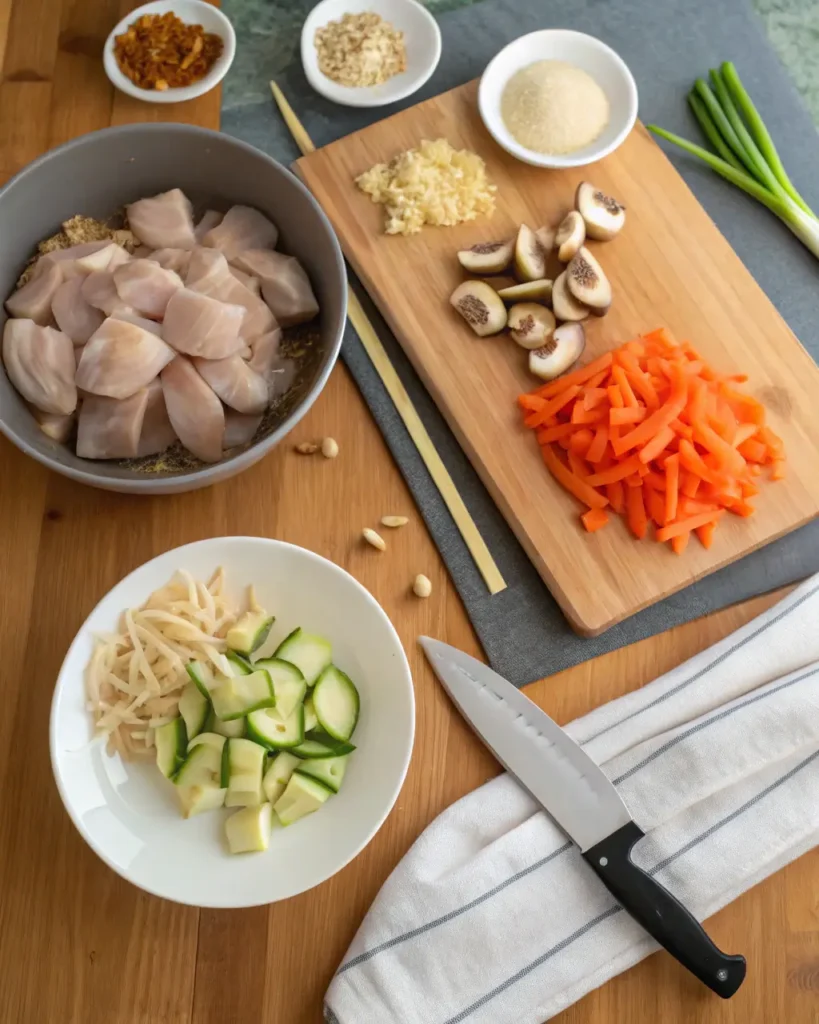
Step 1: Prep Like a Pro
Hibachi cooking is fast—blink and it’s over. So the prep stage is where everything starts. This step is all about mise en place (that’s French for “get your act together”).
- Chop your vegetables uniformly:
You’re going for even cooking and great texture. Cut carrots into thin matchsticks (they take longer to cook), onions into chunky petals (so they caramelize without burning), and zucchini into half-moons or quarters (so they brown but don’t go soggy). - Cube the chicken into even 1-inch pieces:
This ensures it cooks quickly and stays juicy. Uneven chunks will give you dry ends and raw middles—no one wants that. - Pat everything dry with paper towels:
This is a must. Excess moisture creates steam instead of a sear, which means you miss out on that golden crust. Dry meat = better browning = better flavor. - Set up a clean workstation:
Have separate bowls for veggies, protein, aromatics (like garlic), and sauces. This keeps you organized when things start moving fast.
Chef tip: Prep your garlic butter now—just mix 2 tablespoons of softened butter with 1 clove of finely minced garlic and a pinch of salt. You’ll thank yourself later.
Step 2: Make the Fried Rice First
The rice holds heat well, so it’s safe to make ahead—and honestly, it’s even better when it sits for a few minutes. Here’s how to get it right.
- Use cold, day-old rice:
Fresh rice is too wet and sticky. You want firm, dry grains that will fry up nice and separate. Leftover jasmine or medium-grain rice works best. - Scramble eggs first, then remove from the pan:
Lightly beat 2 eggs, season with a pinch of salt, and cook in a bit of oil until just set. Take them out and set aside to keep them fluffy—not rubbery. - Sauté your aromatics:
In the same pan, add oil and sauté diced onions and garlic until translucent and fragrant—about 1–2 minutes. This builds the base flavor. - Add the rice and break it up with your spatula:
Press down and stir continuously to get contact with the hot surface. Cook for 3–5 minutes until you hear light popping and see some browning. - Finish strong with seasoning:
Stir in 1–2 tablespoons soy sauce, a teaspoon of sesame oil, and your garlic butter from earlier. Toss in the scrambled eggs and chopped scallions just before serving.
Optional add-ins: frozen peas, chopped carrots, or a dash of mirin if you want a hint of sweetness.
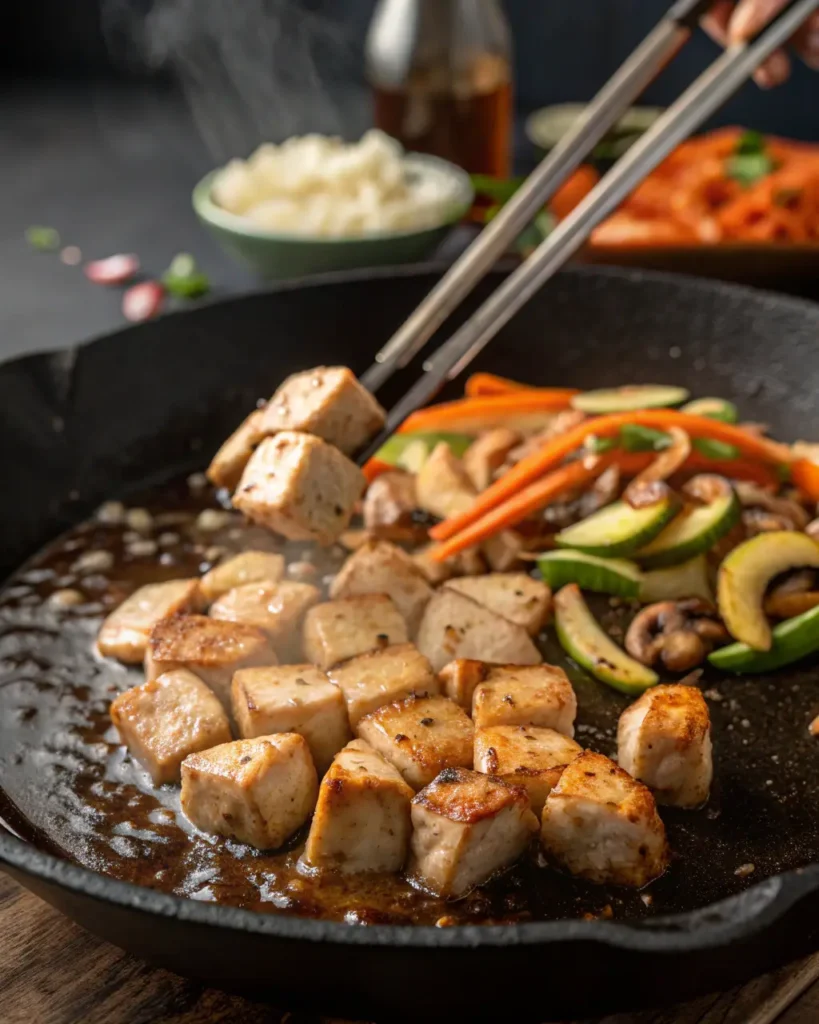
Step 3: Cook the Chicken and Veggies
Time to fire it up—this is where the hibachi experience really comes alive. High heat and short cooking times are your best friends here.
- Preheat your pan until oil shimmers:
Whether you’re using a griddle, cast iron, or carbon steel pan, get it hot. Not warm—hot. You want immediate sizzle when the food hits. - Cook chicken in batches for best browning:
Don’t overcrowd the pan or you’ll steam the chicken. Lay it out in a single layer, let it sear for 2–3 minutes untouched, then flip. When the chicken is almost cooked through, add a spoonful of garlic butter and toss to coat. - Vegetables go fast—stagger them:
Start with the hard veggies like onions and mushrooms. After a couple minutes, add in zucchini and carrots. Stir-fry for 4–5 minutes until they’re crisp-tender and slightly charred. - Season as you go:
A pinch of salt, a dash of soy, and a little oil as needed. Keep things moving and adjust to taste.
Pro tip: Keep a squeeze bottle of water nearby. A quick splash helps loosen up brown bits and creates a flash of steam to soften tougher veggies.
Step 4: Sauce It Right
This final step ties all the components together into a cohesive, flavorful plate—don’t rush it.
- Deglaze the pan with a splash of liquid:
Use water, mirin, or sake. Pour in a tablespoon or two while the pan’s still hot, and scrape up the brown bits. This deepens the flavor and keeps the pan from drying out. - Add soy sauce and sesame oil at the end:
Once the chicken and veggies are back in the pan, drizzle on 1–2 tablespoons of soy sauce and 1/2 teaspoon of sesame oil. Stir everything together until coated and glossy. - Taste and adjust seasoning:
Want more umami? Add a little extra soy or a dab of butter. Too salty? A quick squeeze of lemon balances it out.
Bonus: If you made hibachi mustard sauce or yum yum sauce, now’s the time to warm them slightly and serve them on the side for dipping.
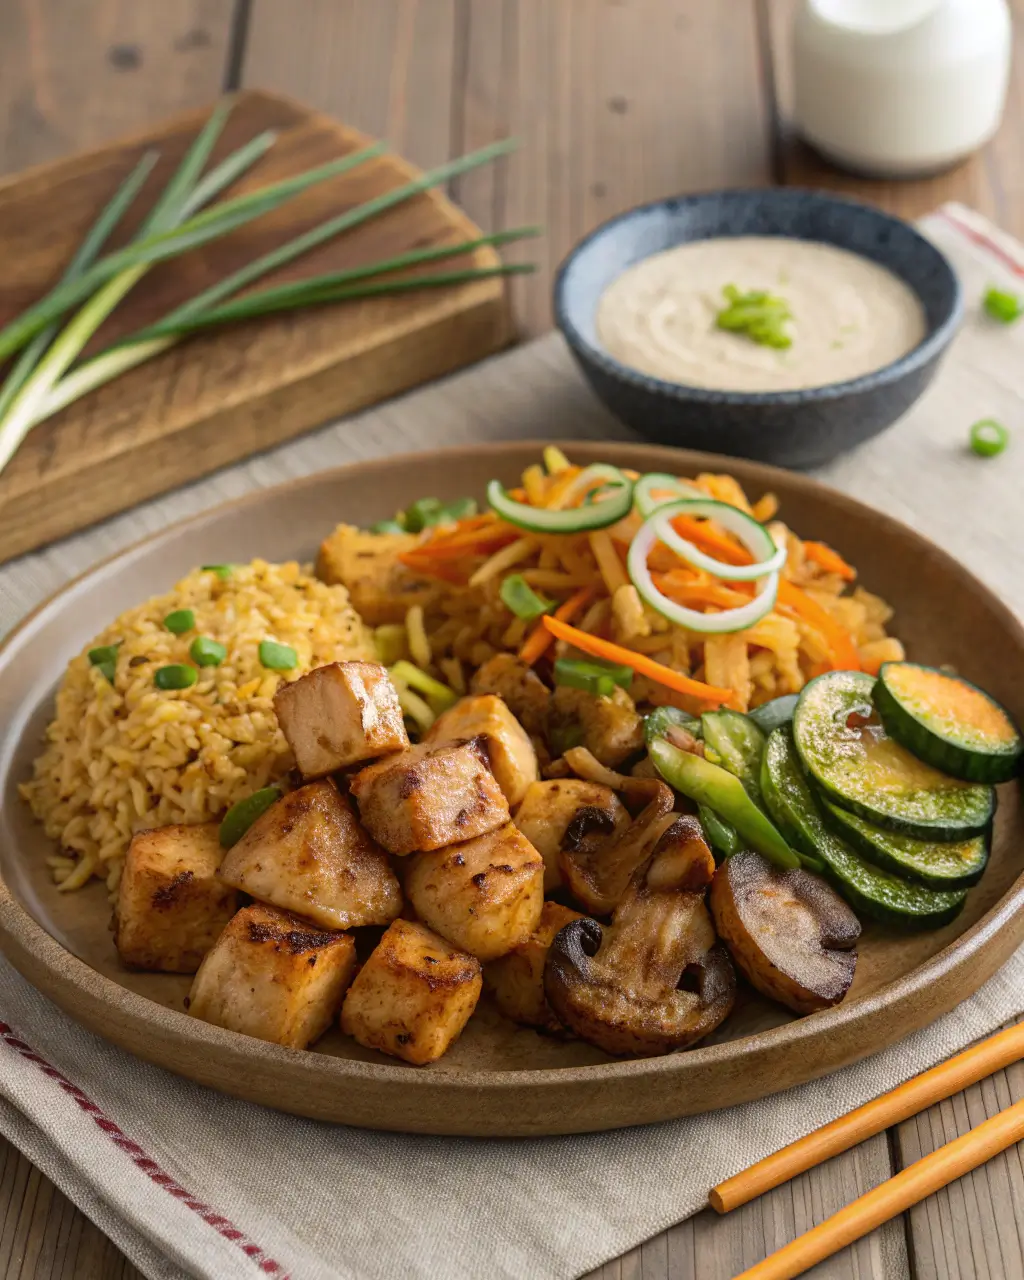
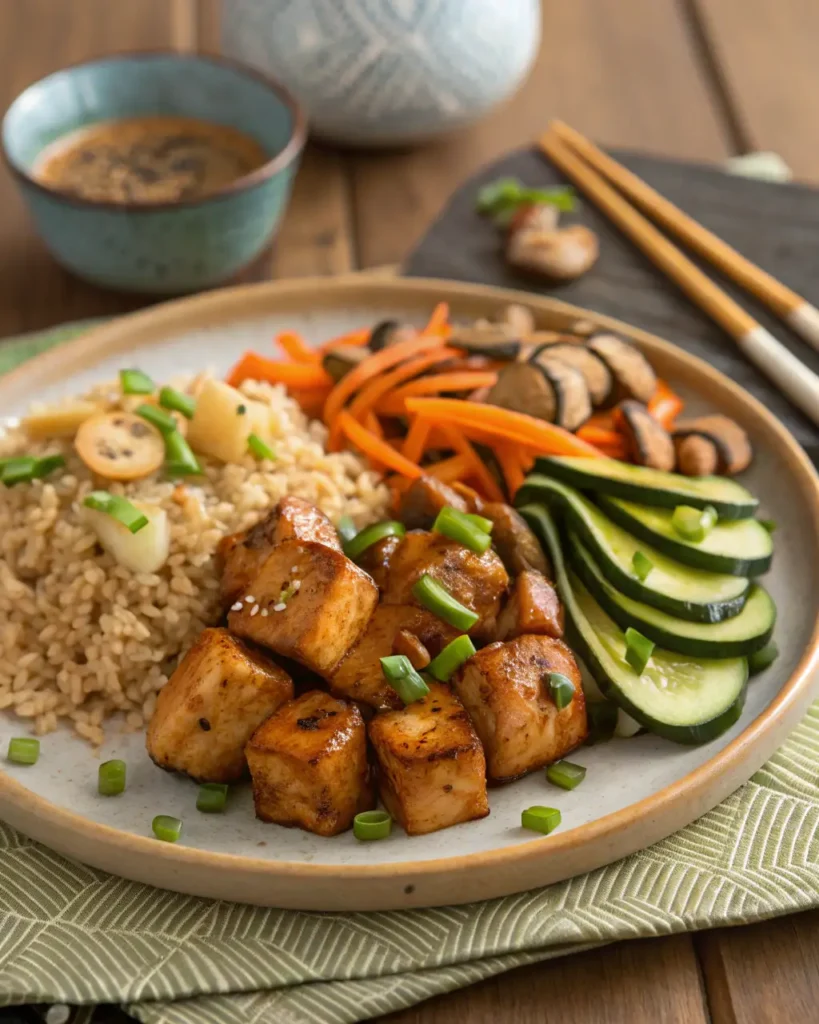
Step 5: Plating and Presentation
- Serve on warm plates
- Stack veggies next to meat
- Spoon fried rice on the side
- Garnish with sesame seeds or scallions
Bonus: Make Your Own Hibachi Sauces
Yum Yum Sauce (Hibachi White Sauce)
- Mayo, ketchup, garlic powder, paprika, sugar, rice vinegar
- Blend until smooth—let rest for flavor to develop
Mustard Sauce (Savory and Tangy)
- Dijon, soy, garlic, cream or mayo
- Perfect with steak or chicken
Include quick recipe table with quantities
Common Mistakes to Avoid When Making Hibachi at Home
- Using wet ingredients—leads to steaming, not searing
- Overloading the pan
- Not preheating your skillet
- Using low-sodium soy sauce—sometimes you need the salt punch
- Skipping the butter finish (don’t!)
Benefits of Making a Hibachi Recipe at Home
| Benefit | Why It Matters |
| Cost-Effective | Cheaper than dining out at a Japanese steakhouse—especially for families. |
| Customizable Ingredients | Choose your favorite protein, veggies, sauces, and spice level. |
| Restaurant-Style Flavor | Recreate bold, buttery, smoky hibachi flavors without leaving the house. |
| Healthier Option | Control oil, sodium, and portion sizes to match your dietary goals. |
| Quick Weeknight Dinner | Cooks fast with minimal prep—perfect for busy evenings. |
| Fun & Interactive Cooking | Great for date nights or family dinners—turns cooking into an experience. |
| Versatile | Use chicken, steak, shrimp, tofu—or make it vegetarian or gluten-free. |
| Great for Meal Prep | Make in batches and enjoy hibachi bowls all week with rice, veggies, and protein. |
Hibachi Recipe FAQ
What’s the difference between hibachi and teppanyaki?
Teppanyaki uses a flat iron griddle, while hibachi traditionally uses an open grate—but the names are often used interchangeably in the U.S.
Can I make hibachi without a griddle?
Absolutely. A cast iron pan or carbon steel wok works great.
How do I make hibachi fried rice taste like the restaurant version?
Cold rice, high heat, garlic butter, and soy sauce are key. Don’t forget the eggs and scallions.
Can I make this recipe gluten-free?
Yes—use gluten-free soy sauce (tamari) and check all sauces for hidden wheat.
Conclusion: Bring the Hibachi Experience to Your Kitchen
That smoky, buttery, sizzling flavor? You can recreate it at home with the right ingredients, a hot pan, and a little know-how. This hibachi recipe is more than dinner—it’s a performance, a memory, and a flavor bomb all in one. So heat up that skillet, channel your inner hibachi chef, and get cooking.
Now go make some noise in your kitchen.
And if you loved this guide, check out our full dinner collection for more real-deal recipes that actually work.