
Ground Venison Jerky Recipe: The Ultimate Guide to Perfect Homemade Jerky
Introduction
If you’re looking for a jerky recipe that’s flavorful, lean, and easy to make at home, this ground venison jerky recipe is your new best friend. I remember my first time trying venison jerky—fresh from a hunting trip with my uncle. The smoky, chewy bites packed with rich flavor stuck with me ever since. Making jerky from ground meat is a game changer: it’s faster, cheaper, and easier to get that perfect texture compared to slicing whole muscle cuts.
Ground venison jerky is ideal for all kinds of adventures—camping, road trips, or just a protein-packed snack for your day. Plus, it’s incredibly customizable, so you can tweak the flavors to suit your palate or what you have in the pantry. For more jerky inspiration and tasty recipe ideas, be sure to follow us on Pinterest..
Table of Contents
Equipment Needed for Ground Venison Jerky Recipe
Food Dehydrator
A food dehydrator is your best bet for consistent, safe, and efficient drying. I personally swear by the Cosori 6 Tray Food Dehydrator. It’s roomy, reliable, and easy to clean—plus, it heats evenly so your jerky won’t end up partially dried or soggy. Sure, it’s an upfront investment, but compared to buying pre-made jerky or the trial-and-error cost of oven-drying, it pays for itself fast.
Jerky Gun
For ground venison jerky, a jerky gun is a must-have. It helps pipe out even strips of meat that dry uniformly, saving you guesswork and frustration. I recommend getting one with multiple nozzle sizes so you can experiment with different strip thicknesses. While you can use a spoon or spatula to spread your mix on parchment, the jerky gun makes the process cleaner and your jerky more professional-looking.
Ingredients for the Best Ground Venison Jerky Recipe
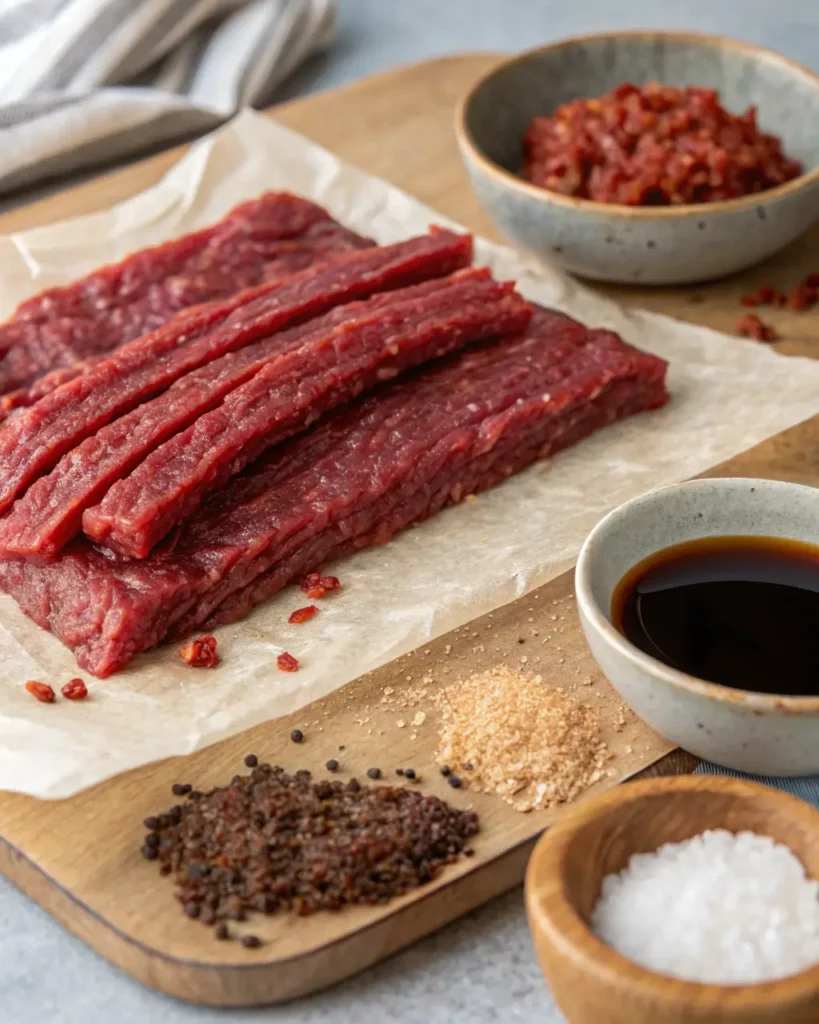
Here’s what you’ll need to nail this venison jerky recipe ground style:
- Lean Ground Venison (or ground deer jerky if you prefer)
Use lean meat to avoid excess fat, which can cause your jerky to spoil faster. - Soy Sauce / Coconut Aminos / Tamari
These give your jerky that savory umami punch and help with the curing process. - Maple Syrup or Honey
Pure maple syrup (preferably dark) adds natural sweetness and helps with caramelization. Honey is a fine substitute if you want a different twist. - Liquid Smoke
This ingredient is key to getting that smoky flavor without needing a smoker. - Prague Powder #1 Cure
Important for safety and color. It’s a curing salt that prevents bacteria growth—use as directed and keep out of reach of kids. - Additional Seasonings
Garlic powder, onion powder, smoked sea salt—plus optional extras like black pepper, cayenne, or paprika to spice it up your way.
Step-by-Step Instructions how to Make Ground Venison Jerky
Preparing Your Workspace
Start by lining your dehydrator trays with parchment paper or silicone liners. This step is crucial because ground venison jerky tends to be stickier than sliced jerky strips. The parchment prevents your jerky from sticking to the trays, making it much easier to remove once dried. Plus, it keeps your dehydrator clean, so you won’t spend half an hour scrubbing afterwards. Pro tip: Cut the parchment paper to fit each tray neatly to avoid curling or bunching during drying.
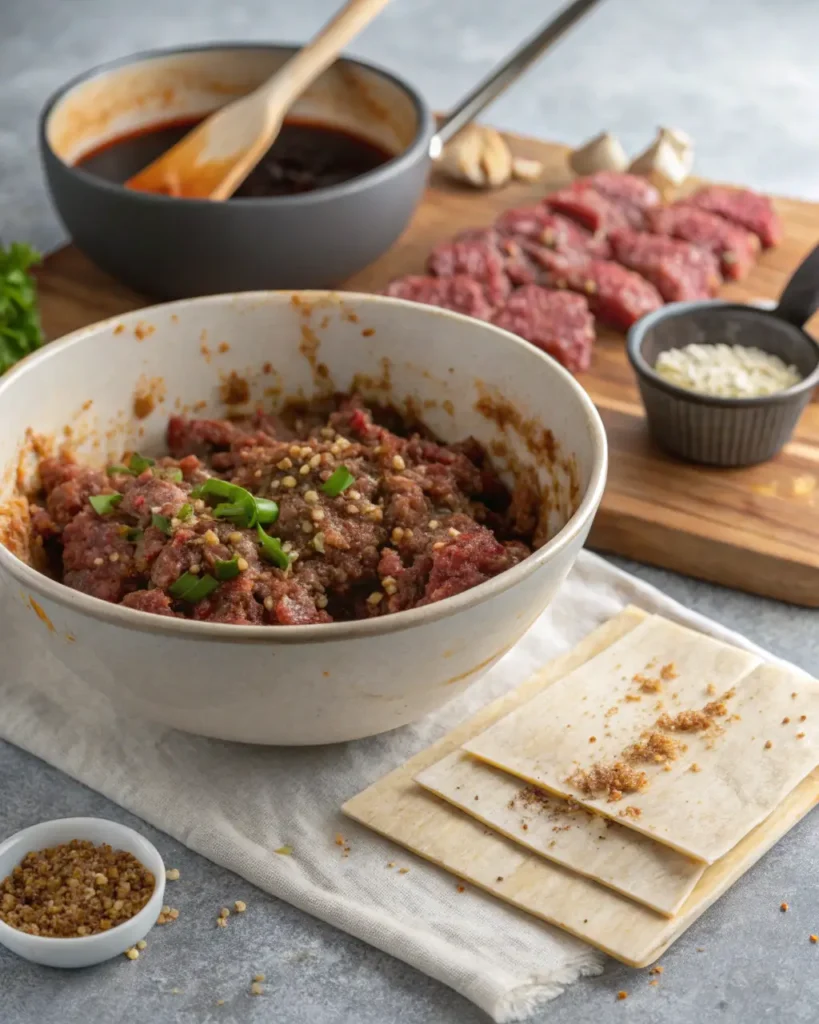
Mixing Ingredients Thoroughly
In a large mixing bowl, combine your lean ground venison with all your flavorings—soy sauce (or tamari), maple syrup (or honey), liquid smoke, Prague Powder #1 (the curing salt), and your chosen spices like garlic and onion powder. This step is key for a great jerky. You want to make sure the marinade is evenly distributed throughout every bit of meat. Uneven seasoning is the most common mistake I see—some bites get too salty, others bland.
Use your hands (clean, please) or a sturdy spoon and fold the mixture gently but thoroughly. Don’t overmix—just enough to get everything integrated. If your meat feels too wet, let it sit refrigerated for 30 minutes to absorb flavors and firm up slightly before loading it into the jerky gun.
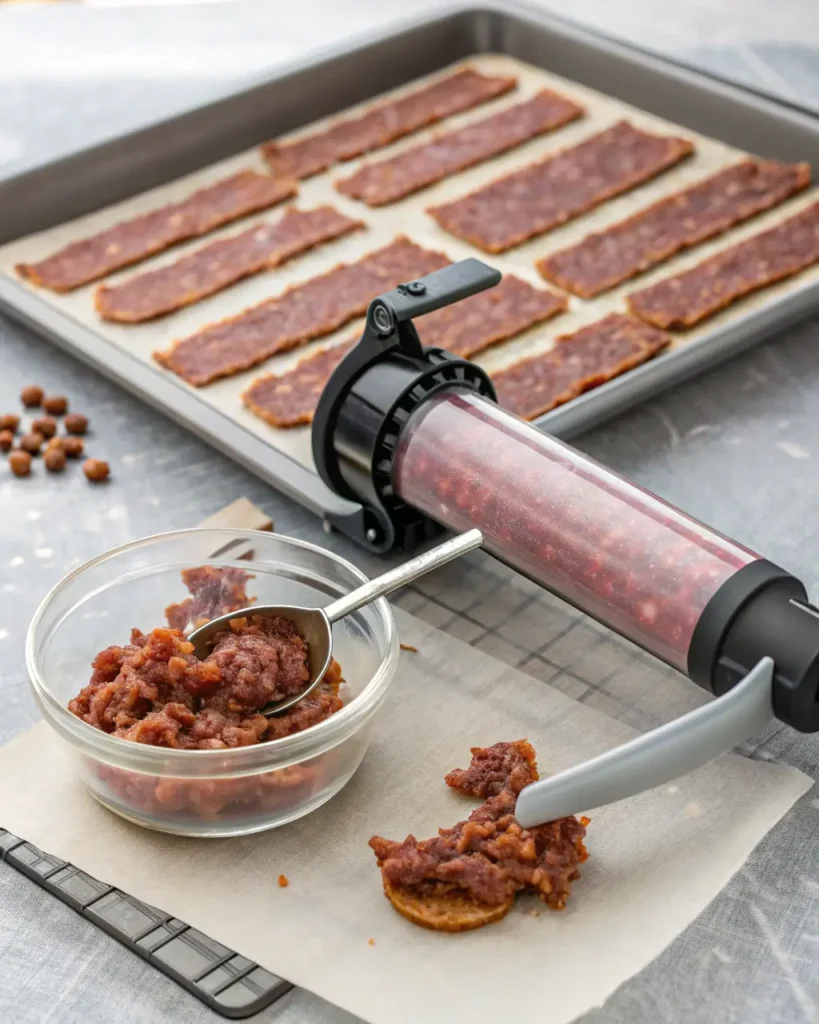
Loading the Jerky Gun and Piping Strips
Now for the fun part: load the jerky gun with your marinated meat mixture. Make sure to pack it firmly so there are no air pockets—this will help create uniform strips. When piping onto the parchment-lined trays, aim for consistent thickness, ideally between 1/8 inch to 1/4 inch thick.
Why does thickness matter? If your strips are too thick, the jerky won’t dry evenly; the inside stays moist, risking spoilage. Too thin, and it’ll dry out too much and become brittle. Try to pipe smooth, straight strips about 1 to 2 inches wide and a few inches long. If you don’t have a jerky gun, you can shape strips by hand or spread the mixture thinly with a spatula, but the gun makes this step faster and more consistent.
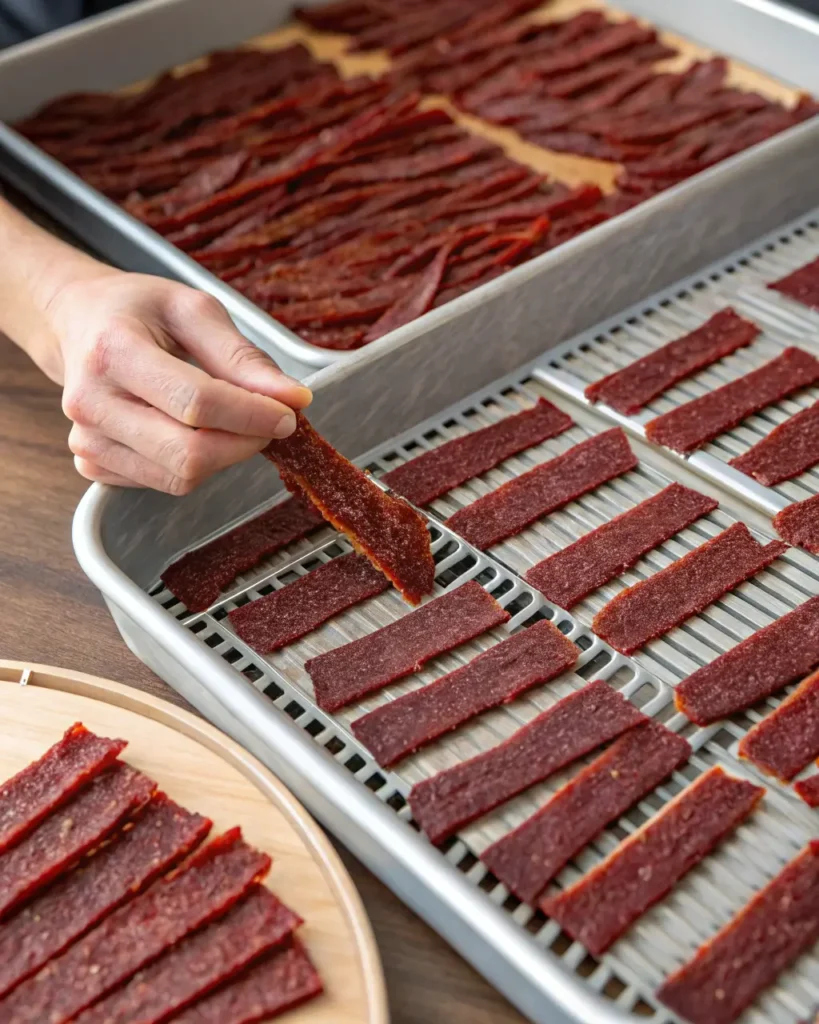
Dehydration Process
Set your food dehydrator to 160°F (71°C). This temperature is important because it’s high enough to safely dry and kill bacteria but low enough to avoid cooking the meat.
Place your trays in the dehydrator and let the jerky dry for 2 hours initially. After this, flip the strips over to promote even drying on both sides—this prevents soggy patches. Continue dehydrating for an additional 2 to 3 hours.
How long to dehydrate jerky depends on several factors: the thickness of your strips, humidity in your kitchen, and the dehydrator model. Expect total drying times around 4 to 5 hours for ground venison jerky.
Doneness Test
Knowing when your jerky is done is part science, part feel. After the total drying time, take a strip and give it a gentle bend:
- It should bend and crack slightly but not snap in half. This means it’s dry enough to store but still pliable and chewy.
- If it snaps cleanly, it’s over-dried and may be too brittle.
- If it’s too soft or sticky, it needs more drying time.
Also, check the texture: your jerky should be dry to the touch with no wet or greasy spots. A good sensory cue is a nice leathery feel—not too tough, not crumbly.
Storage Instructions for Your Ground Venison Jerky
Once dried, let your jerky cool completely before packaging. Store it in airtight containers or vacuum-sealed bags.
- Room temperature: Up to 1-2 weeks
- Refrigerator: Up to 1 month
- Freezer: Up to 6 months or more
If you open vacuum-sealed packages, treat them like fresh and consume within a week or refrigerate to extend shelf life.
PrintGround Venison Jerky Recipe: The Ultimate Guide to Perfect Homemade Jerky

If you’re looking for a jerky recipe that’s flavorful, lean, and easy to make at home, this ground venison jerky recipe is your new best friend. Perfect for adventures and customizable to your taste.
- Prep Time: 15 minutes
- Cook Time: 4-5 hours
- Total Time: 4 hours 15 minutes to 5 hours 15 minutes
- Yield: Approximately 8 servings 1x
- Category: Snack
- Method: Dehydrating
- Cuisine: American
Ingredients
- 1 lb lean ground venison
- 1/4 cup soy sauce, coconut aminos, or tamari
- 2 tbsp pure maple syrup or honey
- 1 tsp liquid smoke
- 1/4 tsp Prague Powder #1 curing salt
- 1 tsp garlic powder
- 1 tsp onion powder
- 1/2 tsp smoked sea salt
- Optional: black pepper, cayenne, or paprika to taste
Instructions
- Line dehydrator trays with parchment paper or silicone liners to prevent sticking.
- In a large bowl, combine lean ground venison with soy sauce (or tamari), maple syrup (or honey), liquid smoke, Prague Powder #1, garlic powder, onion powder, smoked sea salt, and optional spices.
- Mix gently but thoroughly to evenly distribute marinade throughout the meat. Refrigerate for 30 minutes if mixture feels too wet.
- Load the jerky gun with the meat mixture, packing firmly to avoid air pockets.
- Pipe strips onto parchment-lined trays, aiming for 1/8 to 1/4 inch thickness and about 1-2 inches wide.
- Set dehydrator to 160°F (71°C) and dry jerky for 2 hours.
- Flip strips and continue dehydrating for an additional 2-3 hours, for a total drying time of about 4-5 hours.
- Test doneness by bending a strip; it should bend and crack slightly without snapping.
- Allow jerky to cool completely before storing in airtight containers or vacuum-sealed bags.
- Store at room temperature for 1-2 weeks, refrigerate up to 1 month, or freeze up to 6 months.
Notes
Use lean ground venison to prevent spoilage. Prague Powder #1 is important for safety. Jerky should be pliable and leathery, not brittle or sticky.
Nutrition
- Serving Size: 1 oz (28g)
- Calories: 70
- Sugar: 2g
- Sodium: 400mg
- Fat: 1.5g
- Saturated Fat: 0.5g
- Unsaturated Fat: 1g
- Trans Fat: 0g
- Carbohydrates: 3g
- Fiber: 0g
- Protein: 12g
- Cholesterol: 40mg
Keywords: ground venison jerky, jerky recipe, homemade jerky, dehydrator jerky, venison snack
Nutrition Table for Ground Venison Jerky Recipe
| Nutrient | Per Serving (28g / 1 oz) |
| Calories | 70 |
| Protein | 12g |
| Fat | 1.5g |
| Carbohydrates | 3g |
| Sugars | 2g |
| Sodium | 400mg |
| Fiber | 0g |
Note: Nutritional values may vary based on specific ingredient brands and portion sizes.
FAQ About Ground Venison Jerky Recipe
Q: How long to dehydrate jerky safely?
A: Typically 4-5 hours total at 160°F for ground venison, but check texture regularly.
Q: Can I use ground beef instead of venison?
A: Yes, but lean beef (90% or higher) is best to prevent spoilage and excess fat.
Q: What if I don’t have a jerky gun?
A: You can spread the mixture thinly on parchment, but a jerky gun ensures consistent thickness and drying.
Q: How do I know when my jerky is done?
A: It should bend and crack but not snap completely.
Q: What is Prague Powder #1 and is it necessary?
A: It’s a curing salt that helps prevent bacteria. Highly recommended for food safety when making jerky at home.
Conclusion
There you have it—the definitive ground venison jerky recipe dehydrator method that’s easy, tasty, and reliable. Try it out, share your jerky photos and tips, and let me know how it turned out in the comments. Hungry for more ground meat inspiration? Check out our best ground beef chili recipe for a hearty, flavorful meal, or explore vibrant flavors with our collection of delicious Persian recipes.
This is the kind of jerky I want in my pack for every trip—lean, flavorful, and made with care. Now go make your own and taste the wild!