Sugar Cookie Icing Recipe
Let me take you back to my childhood kitchen—holiday music playing, the smell of freshly baked sugar cookies filling the air, and bowls of icing tinted in every pastel shade imaginable. My job? The decorator-in-training, armed with a spoon, more frosting on my fingers than on the cookies. That’s where the love began.
This Sugar Cookie Icing Recipe brings that magic back. It’s the kind of cookie frosting that works every time, whether you’re a beginner baker or a seasoned pro. It hardens beautifully for decorated sugar cookies that are stackable and giftable, yet it’s soft enough to bite into without cracking a tooth. And best of all? No complicated ingredients. No royal icing stress. Just easy cookie icing you can make with pantry staples and customize however you want.
So whether you’re prepping a batch of holiday cookies, crafting cute cookie designs with your kids, or looking for the best icing for cookies to impress your neighbors—this one’s got you covered.
Table of Contents
Why This Sugar Cookie Icing Recipe is the Best Icing for Cookies
Skip the Eggs: Cookie Frosting Without Royal Icing Drama
If you’ve ever looked up icing for decorated sugar cookies, you’ve probably seen recipes calling for meringue powder or egg whites. Not here. We’re going fuss-free.
- No egg whites means no risk, no whipping, and no stress.
- No meringue powder to track down at specialty stores.
- Just smooth, shiny icing that hardens with zero fancy tools.
Pantry Ingredients = Beginner Cookie Decorating Win
This is where the magic happens. You only need a few ingredients:
- Powdered sugar
- Milk
- Corn syrup
- Vanilla extract
- Gel food coloring (optional)
That’s it. You probably have most of these already. And that corn syrup? It’s the not-so-secret secret—it helps the icing dry with a smooth, glossy finish and the perfect texture.
The Most Flexible Cookie Icing You’ll Ever Use
You can use this icing for outlining, flooding, or both. Want to create crisp borders? You can. Want that shiny pool of color in the middle? You can do that, too. Whether you’re making simple frosted sugar cookies or elaborate DIY cookie designs, this icing does it all.
Who Will Love This Easy Sugar Cookie Icing Recipe
This one’s for:
- Home bakers who want reliable cookie frosting without the hassle
- Parents decorating holiday cookies with kids (yes, it’s mess-friendly!)
- Beginners who want easy cookie icing that works every time
- Gift givers putting together cute cookie boxes for birthdays, Christmas, or parties
- Anyone making decorated sugar cookies for fun, profit, or pure cookie joy
Essential Ingredients for the Perfect Cookie Icing
To make about 1½ cups (enough for 24–30 cookies depending on size), here’s what you need:
- 2 cups powdered sugar (aka confectioners’ sugar)
- 2 tablespoons milk
- 2 tablespoons light corn syrup
- ½ teaspoon vanilla extract
- Gel food coloring (optional—but let’s be real, color makes it fun)
Why These Ingredients Work
- Powdered sugar gives you that smooth, fine base with zero graininess.
- Milk helps you control the thickness of the icing.
- Corn syrup gives it shine and allows the icing to set with that slightly crisp surface.
- Vanilla adds depth—sub in almond extract for something different.
- Gel coloring keeps consistency perfect—liquid food coloring is a no-go (it thins things too much).
Step-by-Step Guide to Making Easy Sugar Cookie Icing

1. Mix the Sugar and Milk
Start with a medium mixing bowl. Add powdered sugar and milk. Whisk slowly at first (trust me, that sugar cloud will get you). Keep going until it’s smooth and thick.
2. Add the Corn Syrup and Vanilla
This is where things start getting glossy. Add the corn syrup and vanilla extract, then whisk again. You’re aiming for a smooth, pourable texture—but not too runny.
3. Adjust the Consistency
- For outlining cookies: you want a toothpaste-like texture.
- For flooding: it should flow like honey, but still hold its shape a bit.
Here’s the test: drag a knife through the bowl. If the line smooths out in 10–15 seconds, it’s good for flooding.
4. Add Color
Use gel food coloring. Just a tiny bit goes a long way. Stir until fully incorporated. Want multiple colors? Divide the icing into smaller bowls and go wild.
5. Decorate
Load your icing into piping bags (or zip-top bags with the corner snipped). Outline your cookies first, then fill the middle. Use a toothpick to push icing into corners or pop air bubbles.
6. Dry
Let the decorated sugar cookies dry at room temp. Depending on humidity and thickness, this can take 12 to 24 hours. Yes, it’s worth the wait.
Kitchen Tools for Sugar Cookie Decorating Success
You don’t need fancy gear, but here’s what helps:
- Mixing bowls
- Whisk
- Measuring cups and spoons
- Piping bags or zip-top bags
- Toothpicks or skewers (for detail work)
- Cooling rack (great for air circulation while drying)
Common Cookie Icing Mistakes (and How to Avoid Them)
- Using liquid food coloring – thins out icing and ruins consistency. Stick to gel.
- Over-thinning – a few extra drops of milk can make a flood. Add liquids gradually.
- Skipping corn syrup – your icing won’t harden right or look glossy.
- Stacking too soon – give your cookies a full day to dry before packaging.
- Decorating warm cookies – always let cookies cool first or your icing will slide off.
Pro Tips for Getting the Right Cookie Icing Texture
- Toothpaste = outlining
- Honey = flooding
- Knife Test = best trick in the book. Drag a knife through and time the smooth-out.
- Keep bowls covered with plastic wrap or a damp towel while decorating. This icing dries fast—even in the bowl!
Festive Cookie Decorating Ideas Using This Icing
- Use it on gingerbread, shortbread, or even banana cookies.
- Try marbling two or more colors with a toothpick.
- Add edible glitter, sprinkles, or metallic dust before the icing dries.
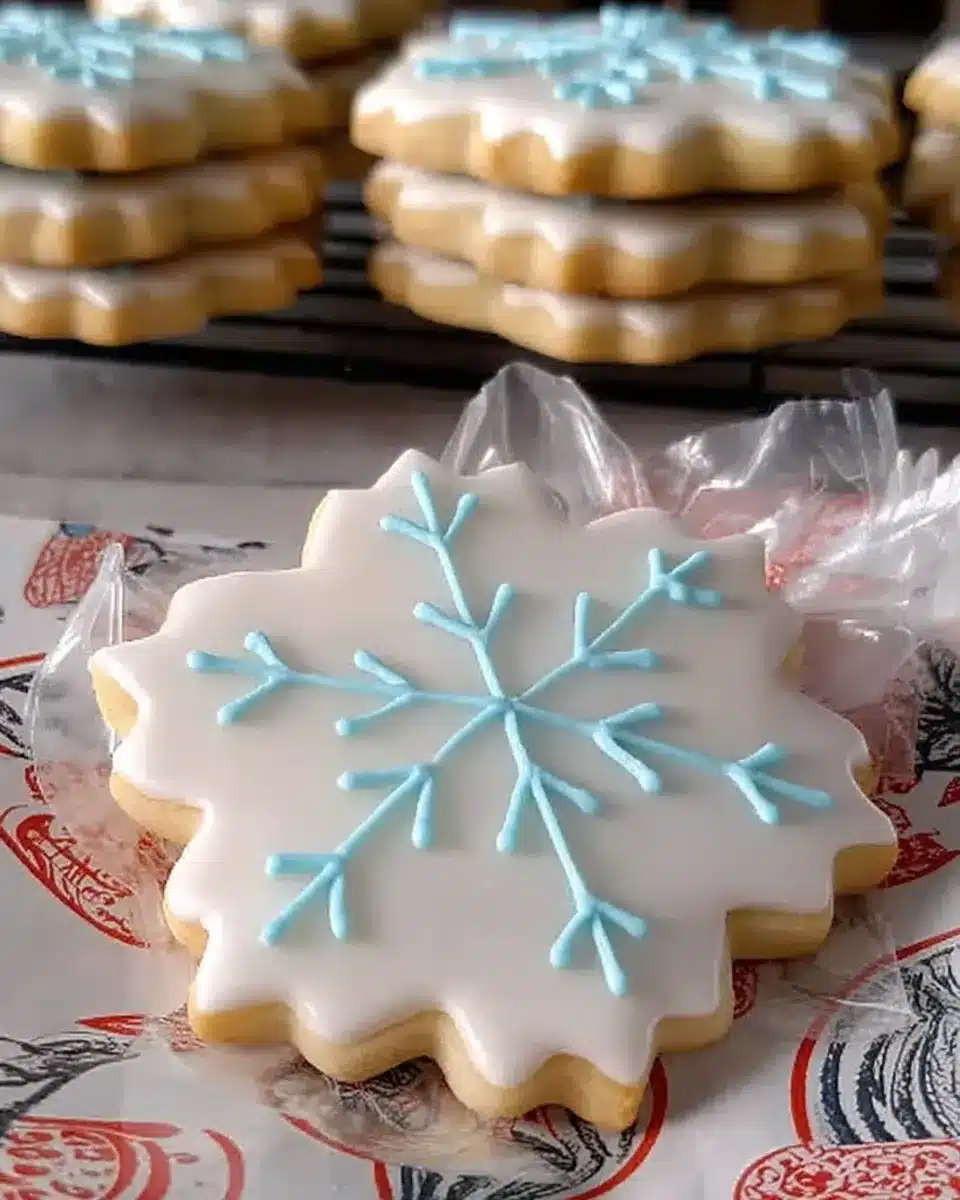
- Create themed cookies: pumpkins, snowflakes, hearts—whatever fits the season.
- Personalize with initials or messages using a fine piping tip.

How to Store Cookie Icing and Decorated Sugar Cookies
For Leftover Icing:
- Store in an airtight container in the fridge for up to 1 week.
- Stir well before using again. Add a few drops of milk if it thickens too much.
For Decorated Cookies:
- Let them dry completely before stacking or storing.
- Place parchment paper between layers if needed.
- You can freeze decorated cookies once the icing is dry—just wrap them tightly to prevent damage.
Variations for the Best Sugar Cookie Icing
- Swap vanilla for almond, lemon, or coconut extract.
- Add a tiny bit of citrus zest for brightness.
- Try natural colors: beet powder (pink), turmeric (yellow), matcha (green).
- Want sparkle? Dust with edible glitter once it starts to dry.
Presentation Tips for Frosted Sugar Cookies
- Match icing colors with your theme—think red & green for holiday cookies or pastels for spring.
- Use shaped cookie cutters: stars, hearts, pumpkins, whatever fits your vibe.
- Wrap cookies in cellophane bags or boxes with ribbon for easy, classy gifting.
- Place on a neutral platter to make your designs pop.
FAQs About Sugar Cookie Icing Recipe
How long does the icing take to dry?
12–24 hours, depending on humidity and thickness.
Can I freeze the iced cookies?
Yes, just make sure they’re fully dry and store in layers with parchment in between.
Will the icing taste too sweet?
It’s sweet but balanced—especially when paired with a buttery sugar cookie.
Can I use this icing on warm cookies?
Nope—let cookies cool completely before decorating or the icing won’t set properly.
More Cookie Recipes You’ll Love
- Homemade Chocolate Chip Cookies
- Soft Batch Chocolate Chip Cookies
- Cotton Candy Cookies
- Banana Chocolate Chip Cookies
- Fruity Pebbles Frosting with Ermine Base
- Strawberry Cheesecake Cookies
Conclusion
This Sugar Cookie Icing Recipe is your ticket to decorating success. Whether you’re brand-new to cookie decorating or just want a no-fuss way to make holiday cookies shine, this icing gives you everything you need. It’s smooth, shiny, easy to color, and it actually hardens the way you want.
Try it once, and it’ll become your go-to for every batch of frosted sugar cookies. Make a few, gift a few, and don’t forget to get creative with your designs.
For more festive cookie ideas, decorating inspiration, and sweet treats, follow my Pinterest page: Emilio Recipes on Pinterest
Now go make some cookies. And enjoy every bite.
Sugar Cookie Icing Recipe

This Sugar Cookie Icing Recipe brings back the magic of decorating cookies as a kid—easy to make, glossy, smooth, and perfect for stacking or gifting.
- Prep Time: 10 minutes
- Cook Time: 0 minutes
- Total Time: 10 minutes
- Yield: 1½ cups icing (enough for 24–30 cookies) 1x
- Category: Dessert
- Method: No Bake
- Cuisine: American
- Diet: Vegetarian
Ingredients
- 2 cups powdered sugar
- 2 tablespoons milk
- 2 tablespoons light corn syrup
- ½ teaspoon vanilla extract
- Gel food coloring (optional)
Instructions
- In a medium mixing bowl, whisk together powdered sugar and milk until smooth and thick.
- Add corn syrup and vanilla extract, then whisk until the icing is smooth and pourable.
- Adjust consistency as needed: toothpaste-like for outlining, honey-like for flooding. Use the knife test: drag a knife through and see if the line smooths out in 10–15 seconds.
- Add gel food coloring. Stir to incorporate. Divide into bowls for multiple colors.
- Transfer icing to piping bags or zip-top bags. Outline cookies, then flood centers. Use a toothpick for details.
- Let decorated cookies dry completely at room temperature for 12–24 hours.
Notes
Stick with gel food coloring for the best consistency. Cover icing bowls while decorating—it dries quickly. Always let cookies cool before decorating.
Nutrition
- Serving Size: 1 cookie with icing
- Calories: 60
- Sugar: 12g
- Sodium: 1mg
- Fat: 0g
- Saturated Fat: 0g
- Unsaturated Fat: 0g
- Trans Fat: 0g
- Carbohydrates: 15g
- Fiber: 0g
- Protein: 0g
- Cholesterol: 0mg
Keywords: sugar cookie icing, cookie frosting, easy icing, no egg, holiday cookies