The BEST Homemade Cinnamon Rolls Ever: Soft, Gooey, and Just One Rise
Let me tell you something—these are the absolute BEST homemade cinnamon rolls ever. I’m not just tossing around adjectives. These rolls are pillowy, the centers are ooey-gooey, the frosting is that cheesy-vanilla glaze you dream about (you know the one), and the best part? Only one rise.
I remember waking up on cold Sunday mornings to the smell of cinnamon rolls wafting through the kitchen. My mom used canned dough (no shame), but now I’ve cracked the code to something way better. It’s homemade, fast, and honestly, they’ll ruin you for any store-bought version.
What Makes These Cinnamon Rolls the Best?
This recipe isn’t one of those all-day baking marathons. It’s streamlined for real life, yet delivers bakery-quality cinnamon rolls with minimal effort. Here’s what sets it apart:
Table of Contents
Simple, No-Fuss Ingredients
You don’t need specialty flours, stand mixers, or hard-to-find ingredients. Just classic pantry staples:
- All-purpose flour – reliable structure with tender crumb
- Granulated sugar – adds sweetness and aids yeast fermentation
- Yeast – instant or active dry, both work
- Eggs – enrich the dough and add moisture
- Butter – key for softness and flavor in both the dough and filling
- Milk and water – a combo that balances texture and rise
- Cinnamon + brown sugar – the signature swirl everyone craves
Every component is chosen for performance and availability. If you’ve got a halfway decent pantry, you’ve probably already got what you need.
Milk + Water Combo = Perfect Dough Texture
Here’s the science:
- Water promotes steam during baking, which helps create a light, fluffy structure.
- Milk adds richness, protein, and a touch of sweetness. It also helps the crust brown beautifully.
This combo keeps the dough soft without making it too heavy—especially important when you’re working with just one rise.
One-Rise Method = Faster Without Sacrificing Flavor
Most cinnamon roll recipes call for two rises (bulk ferment and shaped proof). This one skips the first rise:
- After kneading, the dough rests briefly to relax the gluten.
- Then it’s rolled, filled, shaped, and allowed to rise just once before baking.
This shortcut shaves 1–2 hours off traditional timelines without affecting flavor or texture, thanks to fast-acting yeast and rich ingredients.
Cloud-Like, Pillowy Texture
The dough is formulated to be high-hydration and enriched:
- A balanced ratio of liquids and fat ensures softness
- Proper kneading and resting develop structure without toughness
- Gentle handling preserves the airiness you want in every bite
Each roll bakes up tall, springy, and melt-in-your-mouth tender.
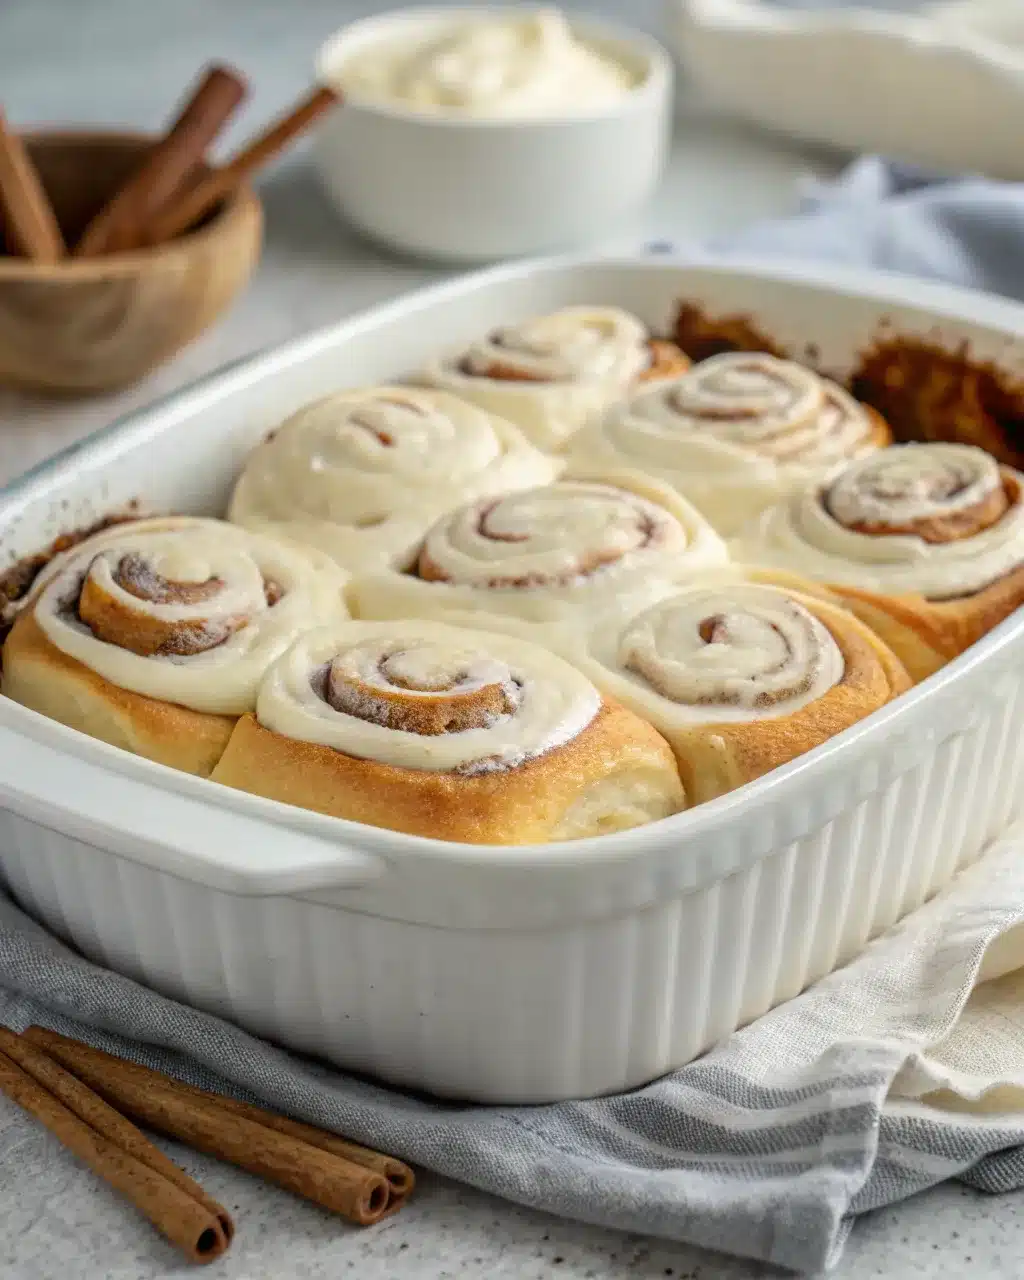
Gooey, Cinnabon-Style Frosting
This frosting is the real deal:
- Cream cheese gives it that signature tang
- Butter makes it rich and spreadable
- Powdered sugar + vanilla balance it out with sweet, creamy smoothness
Spread it on warm rolls and it melts into the swirls like a glaze. Cool the rolls first and it sits thick, like a layer of frosted heaven. Either way—pure bliss.
Yeast Type Discussion: Instant vs Active Dry
Let’s settle the yeast debate, shall we?
Instant Yeast (AKA Fast-Acting)
- No dissolving needed—toss it straight into your dry ingredients
- Rises faster, great for one-rise recipes like this
Active Dry Yeast
- Needs a warm bath (dissolve in 110°F liquid)
- Slightly slower but still totally fine if that’s what you’ve got
Chef Tip: If your yeast doesn’t foam after 5–10 minutes in warm liquid, it’s dead. Toss it. Don’t risk a dud dough.
Step-by-Step Instructions
Let’s roll—literally. Follow these steps and you’ll have soft, golden cinnamon rolls with that perfect gooey center and melt-in-your-mouth icing.
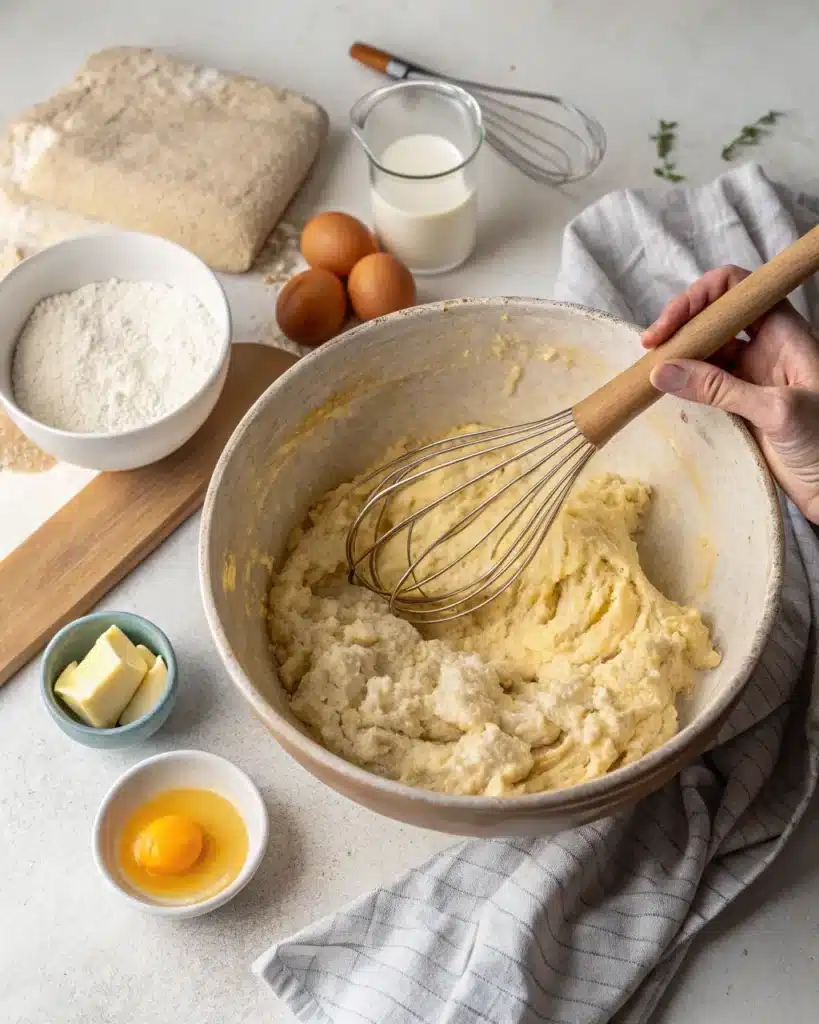
1. Whisk Dry Ingredients
In a large mixing bowl, whisk together:
- 3½ cups of flour (reserve the rest for later)
- ¼ cup granulated sugar
- 1 tsp salt
- 2¼ tsp instant yeast (or active dry, if blooming separately)
Why it matters: Whisking evenly distributes the yeast and prevents salty or sugary pockets in your dough.
2. Whisk Wet Ingredients
In a small saucepan or microwave-safe bowl, warm together:
- ½ cup water
- ½ cup milk
(Target temp: 110°F – warm but not hot to the touch)
Then whisk in:
- ⅓ cup melted butter
- 2 large eggs (room temp if possible)
Chef tip: If the liquid’s too hot, it’ll kill your yeast. Too cold, and it won’t activate properly. Use a thermometer if you’re unsure.
3. Combine Wet and Dry
Pour the wet mixture into the dry ingredients. Stir with a wooden spoon or dough hook until a sticky, shaggy dough forms.
Texture check: It should look rough and messy—this is good. You’re not looking for a smooth dough yet.
4. Add Flour Gradually
Add the remaining flour ¼ cup at a time, mixing after each addition, just until the dough starts pulling away from the sides of the bowl and feels soft but manageable.
Don’t overdo it: Too much flour = dry rolls. The dough should be slightly tacky but not stick to your hands like glue.
5. Knead
Turn the dough onto a lightly floured surface. Knead for 6–8 minutes.
Look for:
- Smooth surface
- Springy, elastic bounce when poked
- Slight resistance when stretched
Why knead?: This builds gluten, which gives the rolls structure and that chewy softness. Don’t rush this step.
6. Rest the Dough (Not a Rise)
Cover the dough with a clean towel and let it sit for 10 minutes. This relaxes the gluten, making it easier to roll out.
Note: This isn’t a full rise—just a short break for the dough.
7. Roll the Dough Out
Roll into a 12×18-inch rectangle about ¼-inch thick.
Pro tip: Dust the surface and rolling pin lightly with flour, but avoid using too much—it can dry out your dough.
8. Add the Filling
Spread:
- ½ cup very soft butter (don’t melt it—just soft enough to spread)
Evenly over the surface, leaving a ½-inch border.
Then sprinkle:
- ¾ cup brown sugar mixed with 1½ tablespoons cinnamon
Technique: Press the sugar mixture gently into the butter to help it stick during rolling.
9. Roll and Slice
Starting from the long side, tightly roll the dough into a log.
Seal the edge by pinching it closed.
Cut into 12 equal rolls using:
- Unflavored dental floss: Slide under and pull up to slice cleanly
- Or a serrated knife: Use a gentle sawing motion to avoid squishing
10. Rise
Place rolls in a greased 9×13 baking pan, spacing them evenly.
Cover loosely with plastic wrap or a damp towel and let rise in a warm spot for 30–45 minutes until puffy and almost doubled.
Don’t overproof: If they get too big, they’ll deflate in the oven.
11. Bake
Preheat oven to 350°F (175°C). Bake for 22–25 minutes, until the tops are golden and the centers no longer look doughy.
Look for: Lightly browned edges and a slightly firm center. Don’t overbake—soft is what we’re after!
12. Frost
While still warm, slather on that glorious cream cheese frosting.
- Want gooey, melt-into-the-rolls magic? Frost immediately.
- Prefer a defined, spreadable layer? Wait 20–30 minutes before frosting.
Dough Kneading Tips
You want a dough that’s:
- Smooth on the outside
- Springy and elastic to the touch
- Slightly tacky (not sticky)
- Not overworked (tough dough = sad rolls)
How to Know It’s Ready: Press a finger in—it should bounce back gently.
Cutting the Rolls
Trust me, this part matters.
Best Tool: Unflavored Dental Floss
- Slide under the log and pull through—cleanest cut, no squish.
Backup: Serrated Knife
- Use a gentle sawing motion. Don’t press down.
Frosting Timing: Warm vs Cooled
Want gooey, melty bliss?
- Frost those babies right out of the oven.
Prefer a thick, creamy layer?
- Let the rolls cool 20–30 minutes before spreading.
Tips for Best Results
- Check Your Yeast: Always test it first
- Temperature Matters: 110°F is the sweet spot for liquids
- Measure Flour Right: Spoon and level—no scooping!
- Soft Butter Only: For the filling to spread evenly
- Kneading Is Key: Don’t skip it, but don’t overdo it
Storage Guidelines
These rolls are best fresh—but here’s how to stretch the magic:
- Store in airtight container up to 3 days
- Reheat: 350°F, covered with foil + a splash of milk (1 tbsp)
Related Recipes You’ll Love
Craving more sweet, cozy breakfast ideas? Or looking for a twist on your cinnamon obsession? Check out these delicious spins:
- Try these fruity strawberry cinnamon rolls for a refreshing twist on the classic.
Perfect for spring brunches or when you want something with a bright, berry punch. - If you love cinnamon, don’t miss this best Amish cinnamon bread recipe.
A super moist, cinnamon-sugar swirled loaf that’s perfect with coffee. - This cinnamon donut bread brings all the warm flavors of a classic roll in loaf form.
Easier than donuts, faster than rolls, and just as delicious. - For another indulgent breakfast treat, try this Hawaiian roll French toast.
Buttery, custardy, and great for feeding a crowd. - These breakfast roll-ups are a great savory counterpart to cinnamon rolls.
Loaded with sausage, egg, and cheese—ideal for breakfast meal prep or brunch buffets.
Overnight Cinnamon Rolls
Wanna prep ahead? Here’s how:
- Stop before the second rise.
- Cover tightly and refrigerate up to 18 hours.
- In the morning, let them come to room temp for 45 minutes.
- Bake as usual.
The BEST Homemade Cinnamon Rolls Ever: Soft, Gooey, and Just One Rise

Soft, gooey, bakery-style cinnamon rolls with a pillowy texture, rich cinnamon filling, and cream cheese frosting—all in just one rise.
- Prep Time: 30 minutes
- Cook Time: 25 minutes
- Total Time: 55 minutes
- Yield: 12 rolls 1x
- Category: Breakfast
- Method: Baking
- Cuisine: American
Ingredients
- 3½ cups all-purpose flour (plus extra as needed)
- ¼ cup granulated sugar
- 1 tsp salt
- 2¼ tsp instant yeast (or active dry, bloomed)
- ½ cup water
- ½ cup milk
- ⅓ cup melted butter
- 2 large eggs
- ½ cup very soft butter (for filling)
- ¾ cup brown sugar
- 1½ tbsp cinnamon
- Cream cheese frosting (cream cheese, butter, powdered sugar, vanilla)
Instructions
- Whisk together 3½ cups flour, sugar, salt, and yeast in a large bowl.
- Warm water and milk to 110°F, then whisk in melted butter and eggs.
- Combine wet and dry ingredients until a sticky dough forms.
- Gradually add more flour until the dough is soft and manageable.
- Knead on floured surface for 6–8 minutes until smooth and elastic.
- Let dough rest for 10 minutes, covered with a towel.
- Roll into a 12×18-inch rectangle, ¼-inch thick.
- Spread with soft butter, then sprinkle cinnamon-sugar mixture evenly.
- Roll tightly and slice into 12 equal pieces.
- Place rolls in greased 9×13 pan, cover and let rise for 30–45 minutes.
- Bake at 350°F for 22–25 minutes, until golden and cooked through.
- Frost warm for gooey effect or wait to cool slightly for thick frosting.
Notes
For best results, use room temperature eggs, warm liquids, and test your yeast. Don’t over-flour or over-knead to maintain softness.
Nutrition
- Serving Size: 1 roll
- Calories: 380
- Sugar: 18g
- Sodium: 290mg
- Fat: 17g
- Saturated Fat: 10g
- Unsaturated Fat: 6g
- Trans Fat: 0g
- Carbohydrates: 50g
- Fiber: 1g
- Protein: 6g
- Cholesterol: 55mg
Keywords: cinnamon rolls, breakfast, homemade, cream cheese frosting, quick rise
Troubleshooting
| Problem | Cause | Fix |
| Dry Dough | Too much flour or over-kneading | Use spoon + level method, knead gently |
| No Rise | Old yeast or liquid too hot | Test yeast, use thermometer |
| Rolls Falling Apart | Under-baked or weak dough | Bake fully, check structure before rising |
Why You’ll Love These Cinnamon Rolls
| Feature | Benefit |
| One-Rise Method | Saves time without sacrificing flavor or texture |
| Simple Ingredients | No special trips to the store—just pantry basics |
| Pillowy Soft Dough | Light, airy texture that melts in your mouth |
| Cinnabon-Style Frosting | Rich, creamy, and slightly tangy—just like the bakery version |
| Step-by-Step Instructions | Easy to follow, even for beginners |
| Versatile | Can be made overnight or same-day |
| Crowd-Pleaser | Perfect for brunches, holidays, or lazy weekends |
| Customizable | Add nuts, fruit, or swap in different fillings to make it your own |
FAQ: BEST Homemade Cinnamon Rolls
Can I freeze these rolls?
Yes! Freeze after baking, unfrosted. Reheat and frost fresh.
Can I use whole wheat flour?
Sure, swap up to 1 cup—but expect denser rolls.
Why are my rolls tough?
Over-kneading or too much flour. Be gentle!
Is it okay to skip the frosting?
Technically yes—but why would you?
Conclusion + Call to Action
If you’ve made it this far, you’re ready to bake the BEST homemade cinnamon rolls ever. This is the kind of recipe that becomes tradition—Sunday brunch, holidays, or just because you need that cinnamon fix. Trust me, once you taste that fluffy dough and melty icing, there’s no going back.
Go preheat that oven. Your kitchen’s about to smell like heaven.
Now go bake some joy—and tell me how they turn out!
👉 Craving more like this? Follow me on Pinterest for even more cozy breakfast recipes, baking tips, and kitchen inspiration. Let’s keep the cinnamon magic going!